Gluten-free chocolate bark

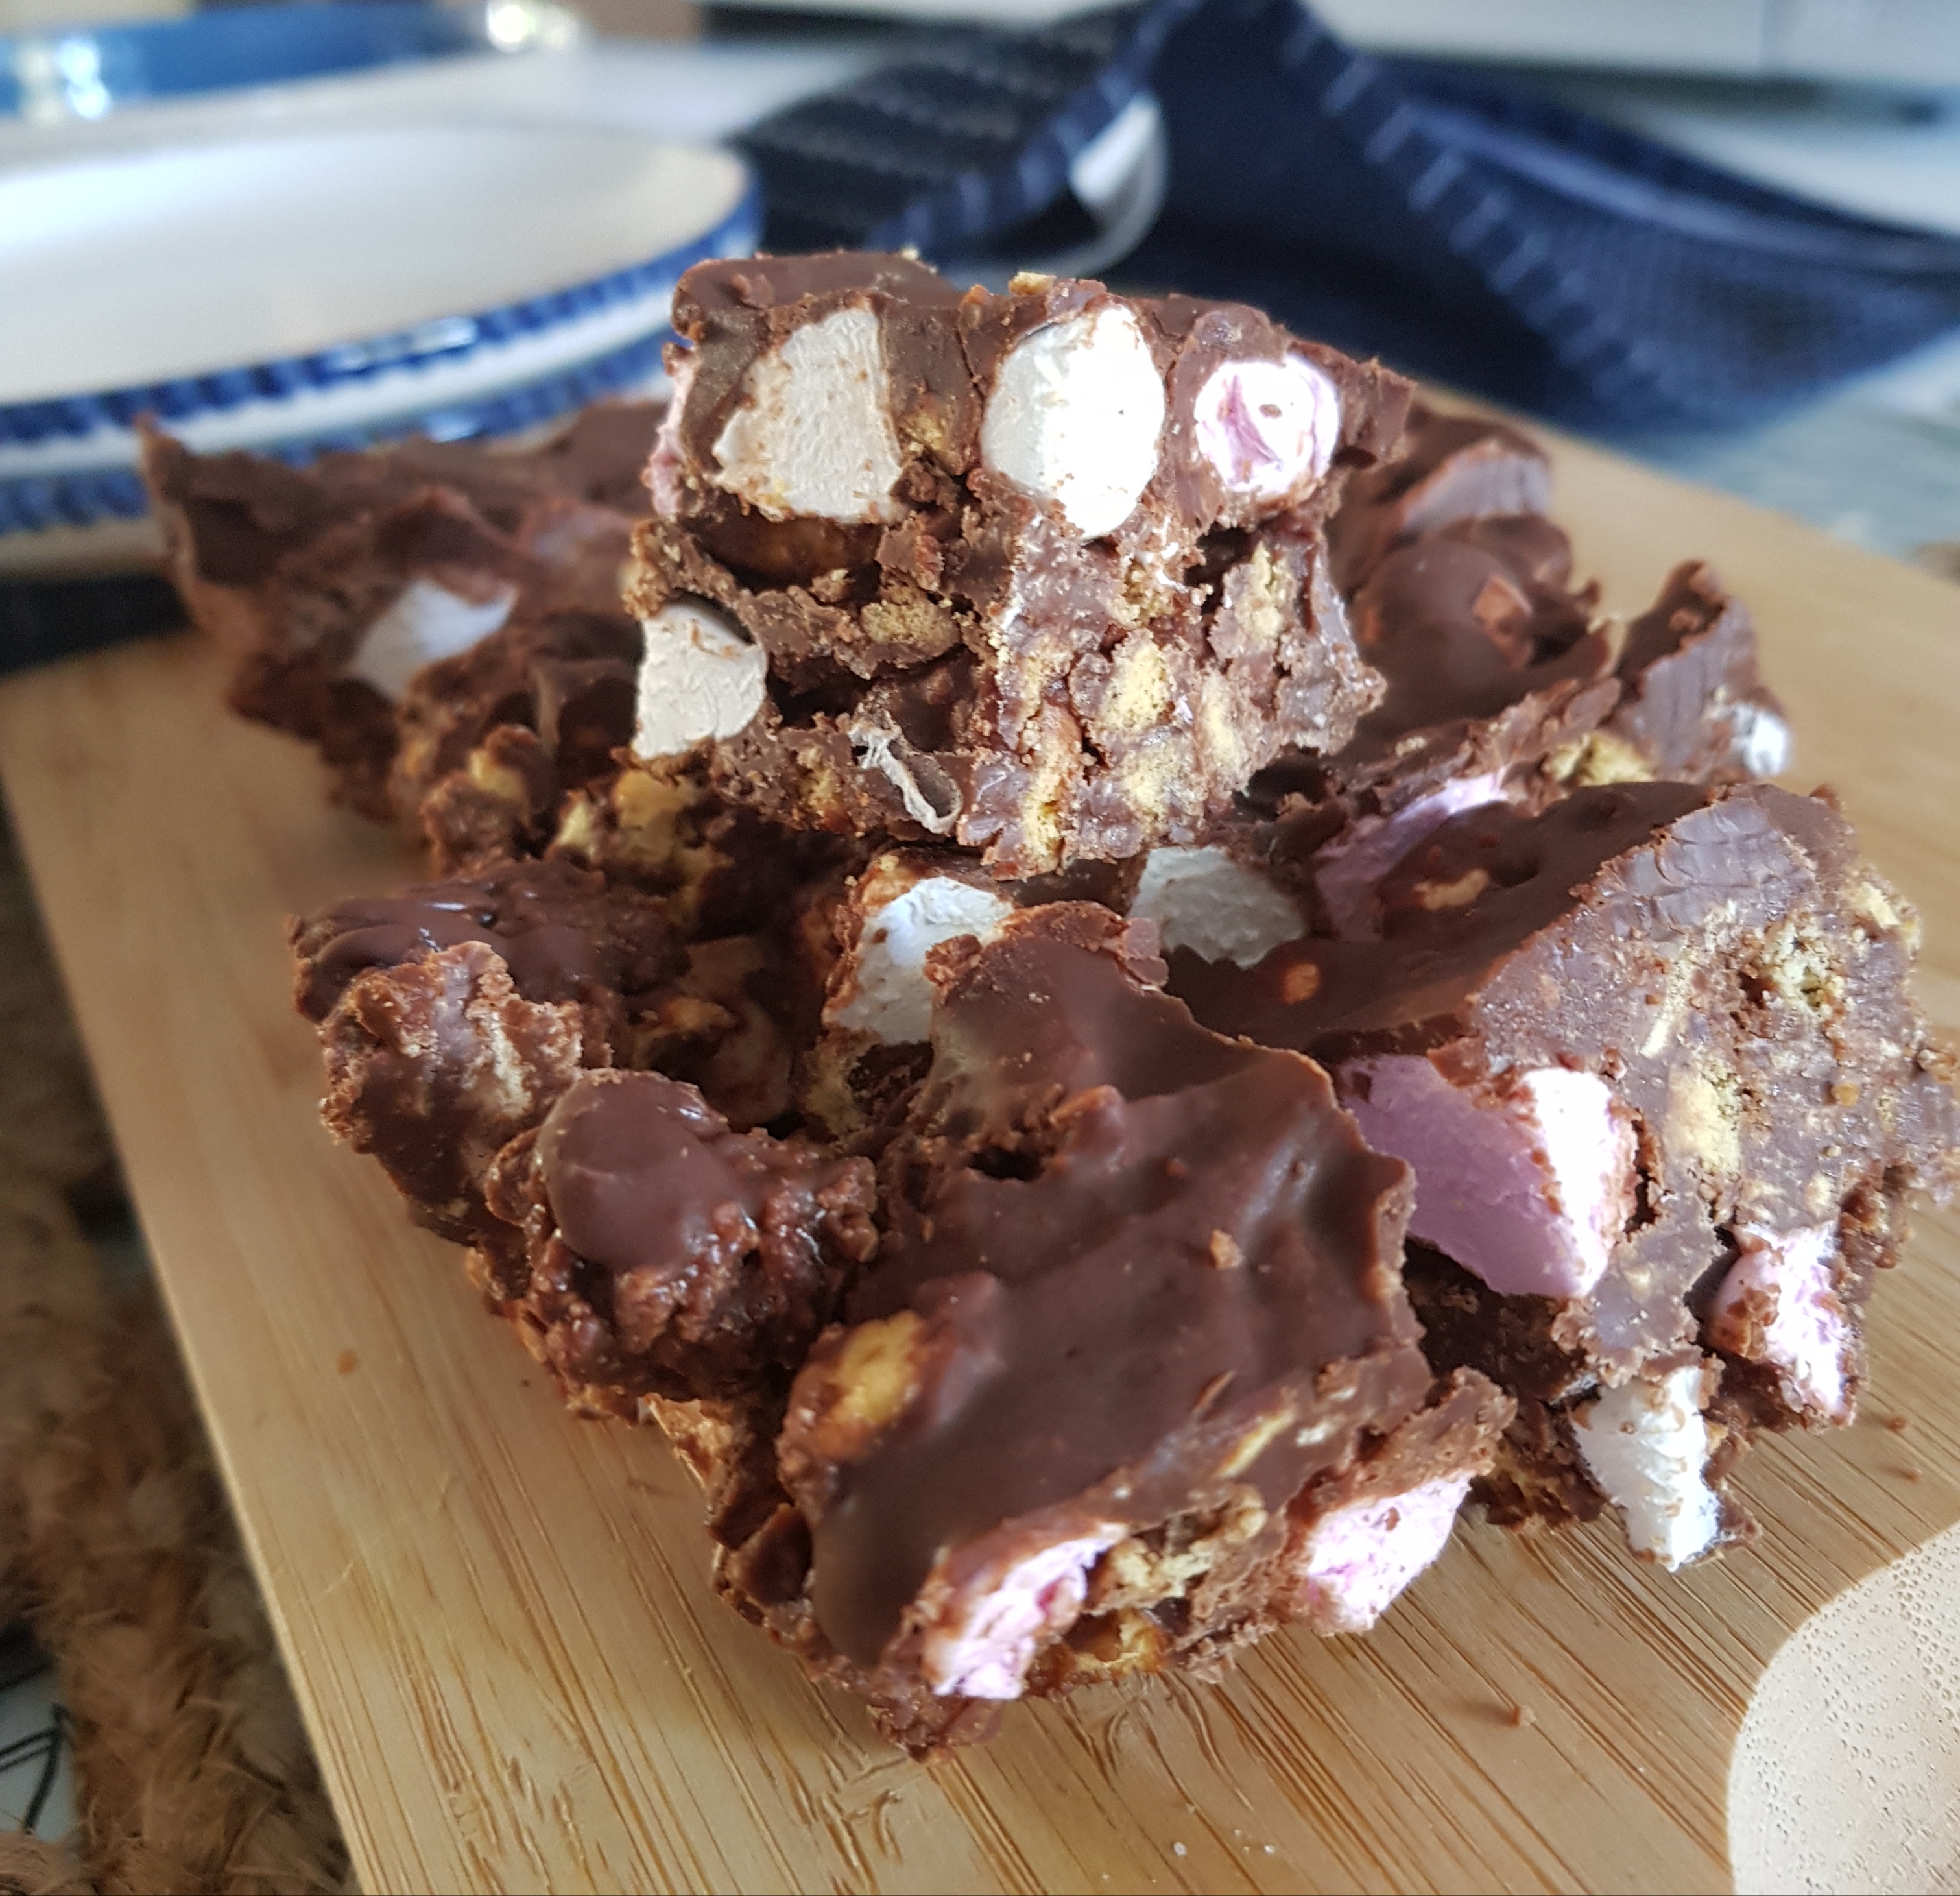
Happy week between Christmas and New Year to you all. I am in the position where I am working, but I don’t really know what day it is and I am still eating stuffing for breakfast (the trifle was finished yesterday). I made quite a few dishes this week, but something I made for some friends as a gift was gluten-free chocolate bark, and although there are many variations of what you can add here, I feel I came away with quite the winner!  

Ingredients
280 grams chopped dark chocolate (I did part plain and part Lindt orange)
Dried cranberries
Almond and cashews (mine were roasted and salted)
One freeze dried strawberry (literally I only used one)
40 grams caramel chocolate drops (you could use milk or white chocolate here)
Dash of sea salt

Directions
Line a brownie tin or large baking sheet with baking parchment.
Melt the chopped dark chocolate in a heatproof bowl set over a pan of barely simmering water. I prefer to melt larger quantities of chocolate in a double boiler as I have here.
While the chocolate is melting, break up the almond and cashews into small pieces.
Once melted and smooth, pour the chocolate into the prepared tin – allow to stand for a few minutes until beginning to set.
Melt the caramel chocolate drops, this can be done in the microwave in bursts of 30 seconds until melted, add the salt and mix.  
On half of the chocolate add your cranberries and nuts, pushing them down slightly into the chocolate and crush the freeze dried strawberry over the top.
On the other half drizzle over the melted caramel chocolate. Take a toothpick and drag it through the melted caramel chocolate to make a swirl pattern.
Chill for at least 2 hours until set. Break up into pieces.

You could use milk or white chocolate instead of the caramel, but I find white chocolate a little too sweet even against the more bitter dark chocolate. The cranberries and cashews are great, and the freeze dried strawberry brings an additional burst of colour, but I do love anything salted caramel, and I think that this combination is an absolute winner. I wrapped this in baking paper and popped in into a tin as a great gift (if I say so myself).  

Gluten-free chocolate pots

The first dessert I ever made, and the first recipe post on this blog, was Jamie Oliver’s chocolate pots. If you love chocolate, these are smooth and delicious and are naturally gluten-free (how we like it). I could probably make them with my eyes closed by now and I have friends who specifically request that I make them because yes, they are that good! Definitely one to add to your gluten-free repertoire.
Thank you, Jamie Oliver.

Ingredients
285 ml single cream
200 grams chocolate – 70% cocoa
2 large egg yolks
3 tablespoons brandy (I am more of a Frangelico or Kahlua girl myself)
20 grams butter
40 grams Crunchie (my new addition – use as much as you feel like)

Directions
In a thick-bottomed pan heat the cream until nearly boiling.
Remove and set aside for one minute.
Snap in the chocolate and stir until melted and smooth (this is easier the smaller you make your chocolate pieces, so I do cut the chocolate up or at least break pieces in half).
Beat in your egg yolks and brandy and stir until smooth.
Allow to cool slightly before stirring in the butter until the mixture is smooth (I add the butter in pretty small pieces to make it easier for it to melt).
Pour into individual serving pots.

Although I have never had this problem, sometimes if you add the butter when the chocolate is not cool enough it will make the chocolate look as if it has been split. To rectify this, allow the mixture to cool a little longer before whisking in a little cold milk until you have a smooth consistency again.

Make these the day before and leave in the fridge to chill.
I usually add some grated chocolate or Flake just before serving, but recently I experimented with some crushed Crunchie on top and you know what, it was a winning moment. I loved it. I also tried adding Crunchie as I melted the chocolate but that was not great, it altered the texture of the Chocolate Pot which, quite frankly, is just not acceptable.    

I serve this in espresso cups, and although this is a rich dessert, I started to double up the quantities and serve in larger cups/glasses – this is for the serious chocolate lovers and, really, life is too short.

The only thing to look out for is the chocolate you use and make sure that under the ingredients it does not state “may contain gluten. Also if you want to switch out the brandy, be aware of any flavoured vodka or other flavoured liquor as gluten can be present.

To make into a lighter mousse, add 2 stiffly beaten egg whites before pouring into the cups. I have not done this but I think I am going to try it this weekend. Stay tuned.

Find recipes from jamieoliver.com here.

Gluten-free peppermint crisp tart

With the Rugby World Cup final happening this weekend (and yes, an amazing result for South Africa last night so I am a little tired this Sunday morning), I thought it would be a good idea to make something a little traditional. Also taking into account the sudden hot weather in Johannesburg, peppermint crisp tart seemed to be a good idea. This is a dessert made of Tennis Biscuits, cream, caramel condensed milk and then peppermint crisp chocolate. The slight complexity is that I have never eaten this, never been able to eat this, and so I am not quite sure what the end result should taste like, and there are many recipes out there with all different ratios of the ingredients. But I know what it should look like, and that has been my guide for this gluten-free peppermint crisp tart.         

Ingredients
375 ml whipping cream
360 gram (1x tin) Nestle Caramel Treat
2x packets biscuits – I used Gullon gluten-free digestive biscuits
30 grams desiccated coconut
300gram peppermint crisp/chocolate

Directions
Whip the cream until soft peaks form.
In a separate bowl stir the caramel to loosen it up to make a smooth consistency.
Fold the caramel into the whipped cream.
Add roughly 2/3rds of the chocolate to the cream mixture, reserving the rest for decoration.
Line your dish with a single layer of biscuits, sprinkle a small amount of desiccated coconut onto each biscuit.
Top with half the cream mixture and then repeat with another layer of biscuits, topping with the rest of the cream mixture.
Sprinkle the last of the chocolate on top and refrigerate covered, preferably overnight.

Second to the issue of not really knowing what this should taste like was finding something that worked like a Tennis Biscuit, which is described as a coconut tea biscuit made with butter, coconut and syrup. My best option was to use a gluten-free digestive and add a little desiccated coconut to try to bring in that coconut taste (I presume – the struggle is real here).   

I was also not sure how well the gluten-free biscuits would hold up, but the proof is in the pudding (literally) and I will have to see what people think of my gluten-free peppermint crisp tart. Reviews from last night are positive and it seems to have delivered on the original– phew! And yes, it is very nice.

The best gluten-free brownie

I realise that I am about to make a strong statement, but for me the best gluten-free brownie ever is the one that you can find at the “naturally fast food” chain Leon in the UK (where fast food is good). And Leon’s has blessed us by supplying the Better Brownie recipe in their Leon’s “Brownies, Bars & Muffins” recipe book. These are a slight commitment to make, and possibly not for the faint hearted as there is a substantial amount of chocolate involved. I make these for friends who do not to follow a gluten-free diet and they also agree that these pretty good! So give yourself some time, get chopping and melting, and make these bad boys.

Ingredients

180 grams unsalted butter plus extra for greasing
200 grams dark chocolate (54% cocoa solids)
1 orange
2 teaspoons espresso or strong coffee
80 grams whole almonds (skin on)
4 free-range eggs
100 grams ground almonds
160 grams dark chocolate (54% cocoa solids, in chunks)
160 grams very dark chocolate (70% cocoa solids)
150 grams fructose
pinch of sea salt
3-4 drops vanilla essence

Directions
Heat the oven to 180 degrees C. Generously butter a 30 x 20 x 5cm baking tray.
Melt the butter in a small pan, and allow it to cool slightly.
In a separate bowl, melt the 200g of chocolate over a pan of hot water, stirring well to make sure that it is properly melted, and being careful not to burn it. Finely grate the orange zest directly into the melted chocolate to catch the oils that are released during the zesting.
Add the coffee and melted butter to the chocolate mixture.
On another baking tray spread out the almonds and toast in the oven for 10 minutes, or until golden, then roughly chop.
Crack the eggs into a large mixing bowl. Add the ground almonds, the chopped almonds, all the chocolate chunks and lastly the fructose. Stir in the salt and vanilla, followed by the chocolate mixture.
Mix well until creamy and thickened, but do not over-mix, as too much air will cause the brownie to crumble when baked.
Spoon the mixture into the prepared baking tray and place in the oven for approximately 20-25 minutes. Take care not to over-bake the brownies. They are ready when the edges are slightly crusty but the middle is still soft. Remove from the oven and allow to cool in the tin.

Note: fructose turns a much darker colour when baked than sugar. The brownie develops a glossy sheen and will not look cooked, when in fact it is. Resist the temptation to cook it for too long. You can replace the fructose with 180 grams of sugar.

These are rich and decadent, but so worth the effort, and taste even better the next day (if that is even possible).

Follow the recipe exactly (even the order ingredients are added to the bowl) and you too shall experience this best gluten-free brownie ever!

And here is the brownie in it’s natural habitat at a Leon’s.

Book cover below – find the magic on page 10!

Gluten-free Rocky Road #2

I have decided that in order to keep the momentum going I will return to some of the first gluten-free recipes on this blog. I use them regularly and I appreciate having them in one place to find as needed. So here we have gluten-free rocky road. This started in 2015 when I was watching an episode of Bill’s Kitchen: Notting Hill (Bill Granger). I had never made Rocky Road or really eaten it, but watching chocolate and butter slowly melt with some golden syrup thrown in for good measure was motivation enough for me to start! I could not find Bill’s exact recipe at the time, and I still can’t, so I have taken bits from recipes online (there are many) and modified to suit my tastes to make my gluten-free rocky road. But then a few weeks ago I saw Mary Berry make rocky road. Her version did not have nuts or cranberries and such delights, but she did use Crunchie which she sprinkled on top. I have taken this idea, but rather smashed the Crunchie and added it to the overall mixture as a little hidden delight, and it takes something that was already amazing to a new higher level.  

It is as Mary Berry says ‘oh so good, very naughty but once in a while we need a treat”.

Ingredients
176 grams chocolate (I use dark chocolate)
100 grams unsalted butter
2 tbsp. golden syrup
50 grams marshmallows (I use gluten-free marshmallows)
100 g biscuits – I use Schar Maria Biscuits or Gullón Digestive biscuits
50 grams nuts and dried cranberries
32 grams Crunchie Bar smashed into pieces of varying size

Directions
Melt chocolate, butter and golden syrup in a double boiler.
Try not to eat it all at this point as is rather good.
Break up biscuits into small pieces. Cut up marshmallows into bite size pieces if not using mini marshmallows. Smash your Crunchie into little pieces.
Mix biscuits, marshmallows, nuts, cranberries and Crunchie in a bowl. Pour over the chocolate and mix well. A hint I picked up from Bill Granger was to keep just a little of the chocolate back at this point.
Line a square baking tray with grease proof paper and pour in your mixture gently flattening it and pushing it down and to the sides.
Then pour over the chocolate you have kept in reserve to make a small layer on the top.
Refrigerate. Once set cut into squares and enjoy. How easy is this?

I do eyeball the amount of cranberries and nuts I use and see what looks right, it also depends on what I have in my cupboard. Originally, I used 125 grams of biscuits but I felt that was a little too much for this ratio of chocolate and dropped it down to 100 grams.

I have made this many times for work and I even take requests now for this as a birthday gift, so this seems to be something that everyone is keen to enjoy.
Great reward for not much effort.
P.S Smashing a Crunchie Bar is harder than it looks – don’t be shy!    

Here are the biscuits I use:

Gluten-free salted chocolate peanut butter cups

So, time for something simple and quick. With 5 ingredients and a little bit of melting and a little bit of freezing, you easily end up with gluten-free salted chocolate peanut butter cups. I saw this recipe and thought “yes, I have black salt, I must make this!”. I actually have Hawaiian black salt and it was exciting to think that there is a purpose for this being in my cupboard. If you like peanut butter cups and the combo of sweet and salty (wait who doesn’t?) then these are for you.

20190331_141524-02

Ingredients

½ cup smooth peanut butter
½ cup malted coconut oil
100g dark chocolate, melted
2 teaspoons melted coconut oil, extra
Black sea salt flakes, to serve

Directions

Line a 12×1 tablespoon capacity mini muffin tin with paper cases.
Place the peanut butter and coconut oil in a small saucepan over low heat and stir until melted and smooth. Divide between the tins and freeze for 15-20 minutes until firm.
While the peanut butter cups are freezing, place the chocolate in a small bowl, add the extra coconut oil and mix until smooth.
Spoon the chocolate mixture into the cups, sprinkle with salt and return to the freezer for 10-15 minutes or until firm.
Remove from the tin to serve. Makes 12. Best stored in the refrigerator until ready to serve.

I did find that letting the chocolate cool down before spooning into the cups was a big help. I also put them back into the freezer for 5 minutes before sprinkling on the salt (I tried one and I was not sure if the salt was sinking so I waited a little, patience counted here).

To prevent mass consumption in one sitting, I did freeze some of these and I just take them out of the freezer for a few minutes for them to soften. And then we eat them!

Recipe from Donna Hay’s “Modern Baking”.

Gluten-free brown rice crispy treats

Slight deviation this week from Donna Hay’s “Modern Baking” with these gluten-free brown rice crispy treats, but this is a recipe by Donna Hay so technically it still counts. I am, it seems, transfixed by any recipe that comes my way that uses puffed rice. Maybe it’s because I can now find gluten-free puffed rice that I feel I need to make every conceivable recipe to make up for lost time.  Maybe I am just a child at heart. Maybe I just like melting things. Either we, we all win here!

Gluten free brown rice crispy treats.jpg

Ingredients

3 cups (45 grams) gluten-free puffed brown rice
1 cup (80 grams) flaked almonds
½ cup (70 grams) pistachios, chopped
¼ cup (50 grams) white chia seeds
½ cup (175 grams) honey
½ cup (140 grams) smooth peanut butter
80 grams 70% chocolate, melted

Directions
Place the puffed brown rice, almonds, pistachios and chia seeds in a large bowl. Place the honey and peanut butter in a small saucepan over medium heat and stir for 3 minutes or until warmed through. Add the honey mixture to the brown rice mixture and stir well to combine.

Firmly press the mixture into a lightly greased 20cm square cake tin lined with non-stick baking paper. Refrigerate for 1 hour or until set.

Cut into 5cm x 10cm pieces, dip one end into the chocolate and place on a baking tray lined with non-stick baking paper. Refrigerate for 20 minutes or until set. Keep refrigerated until ready to serve. Makes 8. 

If you manage to find white chia seeds, then good for you. I failed on that mission, not that I scoured the streets with fierce determination or anything like that, but they just weren’t around. And since the difference between white and black chia seeds seems to be for aesthetics, which are important yes, but not so important that I would spend my weekend searching for them, I think black chia seeds worked just fine.

I am wondering if I need to go on a course on “how to dip into chocolate” since I didn’t get this fabulous smooth dipped end to the treats. I do think that if the chocolate had been less thick it would have been easier, so I will ponder that dilemma. Or maybe it’s just called patience!

You can see the original recipe here 


Gluten-free crispy chocolate coconut bars

The next recipe from Donna Hay’s “Modern Baking” is gluten-free crispy chocolate coconut bars. I have skipped to page 61, probably more because I fancied making these as opposed to there being no relevant recipe between pages 12 and 60. Maybe it’s the legacy of a childhood with no Rice-Krispies that draws me to any recipe like this (the curse of a coeliac diagnosis at age 1). And the combination of coconut and chocolate is always a good idea!

gluten free crispy chocolate coconut bars

Ingredients
150g milk chocolate, chopped
75g unsalted butter
¼ cup golden syrup
3 cups (90g) puffed brown rice
1 cup (75g) shredded coconut
200 g dark chocolate, melted
1 teaspoon vegetable oil

Directions
Line a 20cm square slice tin with non-stick baking paper. Place the milk chocolate, butter and golden syrup in a small saucepan over low heat and stir until melted and smooth. Add the puffed rice and coconut and mix to combine. At this point, I would like to mention that this is hot and let’s just take a moment before we lick the spoon! Press into the base of the tin, using the back of a spoon.

Place the chocolate and oil in a small bowl and mix to combine. Pour the chocolate mixture over the base and smooth the top (getting a smooth top is I believe an art form, I need to make these again and get it right!).
Refrigerate for 2 hours or until firm. Remove from the tin and slice into bars to serve.

EAT! These are delicious 🙂

Visit https://www.donnahay.com.au/ for more information about the book.

Gluten-free dark chocolate pretzel cake

As per my Christmas list, one of my gifts was the new cookbook by Donna Hay “Modern Baking” and although this is not a gluten-free cookbook, a large percent of the recipes is gluten-free. Win win. So, I have decided for 2019 that I will work through this book and bake what I can. I trust Donna Hay, and so I have the utmost confidence that this will be a good year!

We begin with chapter one – chocolate (how convenient). The first recipe that can be used is on the 2nd page so not too far to go before we find a winner and the dark chocolate pretzel cake. I have made many a gluten-free chocolate cake in my time and I think this recipe is at the top of the list (with or without pretzels) and is my new “go to” gluten-free chocolate cake. This is delicious!         

Ingredients
115g unsalted butter, chopped
450g dark chocolate (45-55 per cent), chopped
4 medium eggs, separated
55g caster sugar
2 tsp sea salt flakes
50g store-bought mini-pretzels

Directions
Preheat the oven to 160C. Line a 22cm round spring form tin with non-stick baking paper. Place the butter and chocolate in a large heatproof bowl over a saucepan of simmering water and stir until melted and smooth.
Place the egg whites in the bowl of an electric mixer. Whisk on high speed until soft peaks form. Gradually add the sugar and whisk until thick. Scrape down the sides of the bowl and whisk for a further 2-3 minutes or until the mixture is thick and glossy.

Add the egg yolks and salt to the chocolate mixture and gently fold to combine. In 3 batches, add the egg white mixture to the chocolate mixture and gently fold to combine. Pour into the tin and arrange the pretzels on top. Bake for 25-30 minutes or until the edges are cooked when tested with a skewer and the centre is just set. Allow to cool to room temperature in the tin. Refrigerate for 3 hours or until chilled.

NOTE If you’re going to be refrigerating this cake for longer than the specified 3 hours, remove it from the fridge 1 hour before serving to allow it to come to room temperature.

Visit https://www.donnahay.com.au/ for more information about the book.

Gluten-free choc banana brownies

Whilst multi-tasking over the weekend (in de-clutter mode with the dulcet tones of the food channel in the background), I spotted out of the corner of a my eye a gluten-free choc banana brownie recipe on Donna Hay Basic to Brilliance Kids. For the record, I love Donna Hay,I want to be on her team #lifegoal! I love her recipes, her style, her photography…everything. And for the record I have no issues using kids’ recipes as often they are gluten-free and are something new to try. Obviously, these brownies are never going to beat a Leon Better Brownie, they do not come close. This is more of a healthier nod to the brownie with less chocolate chopping and more date and banana blending. So, you can bake and feel virtuous at the same time.

Ingredients
10 soft fresh dates (200g), pitted
2 bananas (4-00g), peeled and chopped
2/3 cup raw cacao or cocoa powder
1½ cups almond meal/ground almonds
¼ cup light extra virgin oil
2 teaspoons vanilla extract
¼ cup maple syrup

Directions
Preheat oven to 160°C. Line a 20cm square cake tin with non-stick baking paper.
Place the dates, banana, cacao, almond meal, oil, vanilla and maple syrup in a food processor and process until smooth. 
Pour the mixture into the prepared tin, scraping the sides of the processor with a spatula if you need to (the mix is pretty sticky at this point).
Smooth the top and bake for 20 minutes or until just firm around the edges. 
Remove from the oven and allow to cool in the tin for 20 minutes. Then place in the fridge until chilled. Turn out onto a large board and, using a sharp knife, cut it into squares to serve. Makes 16.
You can keep the brownies in an airtight container in the refrigerator. 

You can find the original recipe here